Ready to up your nail game without the salon hustle? Well here’s the ultimate guide to applying gel press-on nails at home – who needs a pro when we’ve got DIY on our side?

This post may contain affiliate links, which means I/we may receive a commission, at no extra cost to you, if you make a purchase through a link. Please see our full disclosure for further information.

Amazon Storefront for more recommended products.
The Ultimate Guide To DIY Gel Press-Ons At Home
1. Prep Like a Boss
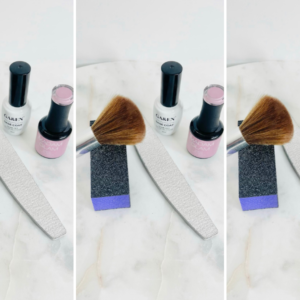
First things first… shape those natural nails, push back those cuticles, and give your nails a quick buff. Now that we have a smooth canvas let’s move on to step 2.
2. Clean Slate, Clean Nail
Wipe the nail surface with some alcohol to make sure it’s super clean. We’re aiming for a flawless finish…no lumps and bumps here.
3. Size Matters
Now here’s where you don’t wanna rush things. Find clear press-ons that snugly fit each nail from side to side. We don’t want them spilling over the edge (this can be remedied by filing the edges to fit if needed) but we definitely don’t want to see your natural nail peeking out either.
4. Adhesive Powerplay
Use a gel nail glue for gel nails (usually provided in the gel nails kit). No shortcuts here. You want those press-ons to stay put for a good three weeks (two weeks at the least). Apply a thin (sticky but not messy), even layer of gel glue on the nail. You’ll want to add just enough to not have glue seeping out the sides of the nail.

5. Press-On Precision
Now the moment of truth. Press those babies on, starting at an angle toward the cuticle then firmly pushing down as you lay it flat against your natural nail. Apply a little pressure as you flash cure (60-90 seconds) to make sure that bad boy is on there good.
6. Custom Cut
Now decide if you want to keep the length of the nail as is (if so just shape the edges lightly with a nail file). If you do decide to take away some length it’s best to use one of those nail clippers that help you get them all the same length. This thing will save you so much time and headache!

7. Gel Magic
Now seal the deal with a gel top coat for that super glossy, professional look. Pop your hands into a UV lamp for a full cure of about 60 seconds and you’re done! Pro tip: Cuticle oil goes a long way, add some and watch how it takes your nails to another level. Want some nail design Inspo? Check out last week’s post on The Top 10 Custom Press-On Nail Designs To Try This Season.

There you have it – The Ultimate Guide To DIY Gel Press-Ons At Home. Look at how much money you saved by skipping the salon. Now take you and your new nails shopping and soak up all the compliments coming your way!


