Thinking about your buying your press on nail packaging? Well read below, you may decide it’s cheaper to just do it yourself!
This post may contain affiliate links, which means I/we may receive a commission, at no extra cost to you, if you make a purchase through a link. Please see our full disclosure for further information.

This post is about how to create box labels for your press on nail packaging.
What you will need:
- Cricut machine
- Cricut Design Studio ( free app for Cricut)
- Oracle 631 Vinyl
- Transfer tape
- Mat
- Scissors
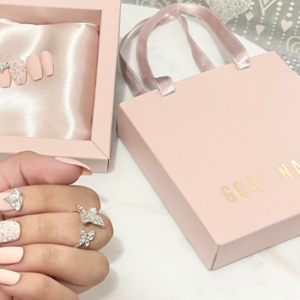
Remember when you’re first starting out you will want to save money any way you can. Well, this is one way that I found to save money by making my own box labels for my press on nail business. Below, I show you the steps I used to create the packaging for my press on nail company, GOAT Nails.
I’m using the Cricut Explorer Air 2. I absolutely love this machine! It’s worth every penny! I purchased mine when it periodically goes on sale, mostly everywhere for $179.99. For those that may not know, the Cricut is basically a cutting machine that can cut through materials like vinyl (and many others) to create pics, wording and more. The vinyl I’ll be using is Oracle 631. Think of this vinyl as a somewhat, removable sticker.
Select Font
To get started first you will want to get things ready in your Cricut Design Studio, the app for Cricut. Once inside, you’ll start by creating a project and finding your preferred font and type out your wording.
Change Colors and Size

You can change the colors by highlighting the word then choose edit. Select the cut color. Then size your wording based on how you would like it to appear on the box.
I have mine sized as 0.77H and 2.05W for NAILS and 1H and 1.7 W for GOAT. For the image combined it’s 1 inch height and 3.39 inch width. For cursive fonts you’ll need to group the letters by selecting the word, actions, then select group. Note: for cursive text make sure to ‘weld’ the letters together after grouping by selecting the word then actions, then weld.
Cutting Time
Now your wording is ready to cut. Make sure the dial on your Cricut is on ‘vinyl’. Select ‘make it’. Make sure to pay attention to how much space the wording is using (shown on your screen). Now prepare your physical mat and cut a piece of vinyl to fit the amount of space needed.


Load Vinyl
Now stick your vinyl to the mat with color side facing you. Then select continue on your screen to load the mat into your Cricut.


The machine will start cutting your wording and once it’s complete you will just peel off all vinyl around the lettering. You should be left with just your lettering (see below).
Transfer Tape

Take enough transfer tape to cover your wording in order to transfer your wording to the packaging.
That’s it! You’re all done!
This post was about how to create box labels for your press on nail packaging.


