If you’re like me you want to save as much money as you possibly can when starting your press on nail business. Which leads me to why I decided to create my own instruction cards to send out with my orders. Learn how you can create press on nail instructions using Canva and index cards. I promise it’s quick and easy!
This post may contain affiliate links, which means I/we may receive a commission, at no extra cost to you, if you make a purchase through a link. Please see our full disclosure for further information.

This post is about how to create press on nail instructions using Canva.
If you would like to skip these steps and purchase my already created template that you can easily edit to add your company logo and social media handles, click here.
Things to know:
- I used 4 by 6 blank, unruled index cards. The unruled index cards should be blank on both sides.
- The printer I’ll be using is a Canon MX 922.
- I will be using the free version of Canva.
Ok , now that’s out of the way, let’s get started.
Before Starting
- Save a copy of your logo
- Decide your colors
- Have your social media handles handy
- You’ll need your website address
- You’ll need 4 x 6 index cards
- You’ll need a printer
1. Drafting the Contents
The first thing you will want to do is think about what you want to include in your instructions. It’s a good idea to have your logo and it’s easier for the customer if you number the steps. To cut down on spending, you can double the instruction cards as thank you cards as well. You should also encourage your customers to leave a review. You’ll want to include your social media handles as well as your website info.
So, now we’re ready to open up Canva. I’ll show you exactly what I did to create my press on nail instructions.

2. Logo
You’ll start by selecting ‘Create a Design’ and entering in your dimensions. We will be using blank index cards in size 4inch width and 6 inch length. Then select ‘Create New Design’.
Now, let’s get our logo that we already have saved and add it by selecting ‘Uploads’ from the left panel , select ‘Upload Media’ then select ‘Device’. Find your image then click open. Once you have your image, click on it and it should move over to your work area. Then drag the corners in and out to size it how you like. I’ve centered mine at the top.

3. Border
Let’s grab a border. To do this, select ‘Elements’ from the left panel. Type shapes in the search box, then choose the square that’s not filled in. You should see the square in your work area. Now let’s change the color. I’ll be changing mine to gold. Select the color icon at the top, then select your color. You can also type this, #D9BC73 into the search box to get my exact color.
4. Text
Now, we can start adding the actual instructions. I’ve included the actual text below so you can just copy and paste if you’d like.
To add your own text select, ‘Text’ from the left side panel and choose ‘Add a little bit of body text’. The text may show up under your frame, if so just select it and drag it inside the frame box and start typing.
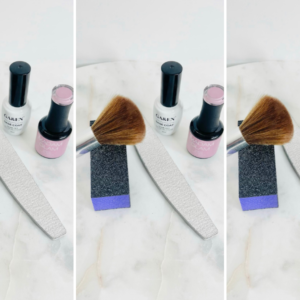
- Gently Push back your cuticles.
- File your natural nails, making sure they are all the same length then buff the top to remove shine.
- Wipe each nail with rubbing alcohol, then let dry
- Place nail glue on your natural nail and the press on nail.. Apply the press on nail and hold in place for about 15 seconds.
- Font (Inside frame and social media): League Spartan
- Font (Thank you): Dancing Script
- Font size: (inside frame): 24.8
(love your set): 26
(thank you): 61.6
(social media): 23.5
5. Thank you
I wanted to make sure to include a thank you and I want to remind my customers to leave a review. I chose to include this under the frame box. My exact color is #F2A1CE.
6. Social Media/Website
Add your social media handles and website at the very bottom under your ‘Thank You’. If you want to add social media icons, select ‘Elements’ from your side panel box and type ‘Social Media’ in the search box. Click on your choice and drag the handles to size the way you like and boom you’re done!


5. Printing
Last step.. Printing! Open the file you just saved (should show up under ‘downloads’ on your computer) and click print. If you have the same printer as I do you can just load the upper tray with your index cards and select print settings. Then, on your printer display, enter 4 x 6 for the page size. Going back to your computer, select paper size 4 x 6 on your computer print screen, then click print.
This post is about how to create press on nail instructions using Canva.


