Want some press on nail packaging ideas? Well I’ll show you what I did and give you some ideas on other great ways to package your press on nails to sell.
This post may contain affiliate links, which means I/we may receive a commission, at no extra cost to you, if you make a purchase through a link. Please see our full disclosure for further information.

This post is about press on nail packaging ideas.
What you will need:
- Jewelry Boxes
- Mounting Tape
- Instruction Card
- Business Card
- Freebies
- Mini File/Mini Buffer
- Mini Cuticle Stick
- Mini Nail Glue
- Bubble Mailer
Now that you’ve made your press on nails, you’ll will want to package them up nicely to sell.
Packaging your press on nails is one of the best ways to showcase your brand. It gives the customer an insight into your brands look and feel before even using the product.
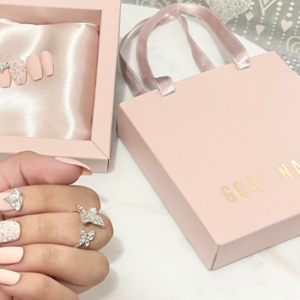
I package my press on nail sets in white jewelry boxes. You can decide what looks best to you and the image you want for your brand. After debating between different options of packaging, I went with boxes because they were conveniently available at the time, in a package of 3 sizes for $1 at Dollar Tree! I actually love how nice the boxes look and the idea that the customer can keep them to store their press on nails is just great!
I chose white, because at the time it was the only color that was available. I knew I liked pink and gold together and white was just a natural addition to compliment those colors. So I chose pink, white and gold as my brand colors. These are the colors I use no matter where my brand is displayed.
Displaying your nails
I use jewelry boxes to display my press on nails. The boxes I use are available in 3 sizes. The long rectangular bracelet box is sized (8 1/16″ x 2 1/4″ x 1 3/8″), square necklace box is sized about (5 1/4 x 3.5) and small square earrings box is sized about (3.5 x 2 1/4). I would use the long rectangular box for one set of medium to long press on nails. I’d use the square necklace box for when you have multiple sets to include in one order. Also, when you have an order of short nails, the small square earrings box comes in really handy. These are just ideas, you can really choose whatever method you would like as you can see below, I used the square bracelet box to package a single set. You really can’t beat the value in the 3 box package for $1 it’s literally everything!
So, taking my jewelry box, I start by cutting about a 5 inch piece of mounting tape and placing it in the box. You’ll get used to determining the size of mounting tape to you based on things like the size of the nails and the size of the box you choose.
The mounting tap is double sided so you’ll stick one side to the box, then remove the red strip and stick the nails on top. This will allow the nails to stay in place, until the customer is ready to remove them.
Once you have a good amount of tape centered in the box, then place the nails left to right in order from pinky to thumb and thumb to pinky, inside the box (see below).


Prep Kit
Let’s put together our prep kit. The prep kit includes the free with purchase items that your customer can use to help them get started with applying the nails. I mail my prep kits in white sheer organza bags. They have a little draw string to keep everything inside. I chose size 4 x 6, which as you can see if more than enough room, but again you will want to purchase the size based on what you will be placing inside.
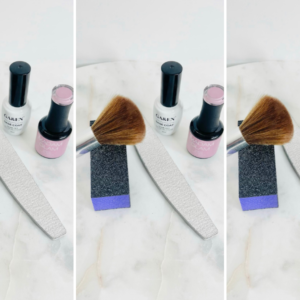
The prep kit should consist of some variation of mini file, cuticle pusher, and mini glue. I also, include our business card Zazzle.com inside every prep kit. Other things you could include are nail sticky tabs and a mini buffer. You can try to include some or all of these things depending on your budget, but I’m sure your customer will appreciate any help you can provide them in successfully being able to apply your press on nails.


Free gift?
While this is not necessarily a required step, I just think its a nice gesture. It’s just a nice extra step to say thank you for choosing my business to purchase your press on nails. If you aren’t able to afford to do this right now, don’t worry about it. Once you are able to then I would start to include this in your orders.
I package my free gifts in Zipper Seal Bags. These clear 3.8 in. by 5.75 in. bags are a great size for the freebies I include. Each package includes 40 bags for only $1! In the beginning I wasn’t able to do this quite yet, but soon after I was able to start including free gifts with purchase. I always include a removable sticker, lashes and/or candy. Just depends on what I’m able to get my hands on that works with the budget. Other free items you could include are: rings, scrunchie’s, pins, etc. You can really get creative here, using your budget, some things you think your customers would like. Just make sure you keep in mind the shipping weight as you consider different ideas. If you are able to get little thank you stickers to go on the bags, that would be even better.
Bubble mailers
Now you’re ready to get everything inside your bubble mailers to go out for shipping. Bubble mailers are just the packaging envelopes that includes bubble wrap within the packaging, to keep your contents extra secure from being damaged during delivery. The bubble mailers I use are size, 6 x 10. You will want to decide your bubble mailer size, based on the size of the boxes or packaging you chose for your nails, keeping in mind everything else you plan to include in the order.
Make sure to include your instructions and customer receipt, also place your shipping label on the package, everything is ready to go out for delivery.


Be on The Look Out for:
A step-by-step process on how to create instruction cards using Canva.
Also coming soon, I’ll walk you through how I created my labels for the boxes and freebie reusable butterfly stickers, using my Cricut Explorer Air 2.
Other great options
Though the jewelry boxes are by far the most popular of the packaging ideas for press on nails, there are so many other options available. The option you choose will have a lot to do with your budget and the look and feel you’re going for with your business.
Here are a few others that you may be interested in:
Some choose the option of using a 3 1/5 x 5 or larger, card stock that includes your logo with the nails attached. You choose many color options for your cardstock. With this option you could insert the card stock into Cellphane Bags. This is the most budget-friendly option.
Others have chosen the option of using the above method, but inserting into Hollographic Zipper Lock Bags instead of cellophane bags.
Some have found boxes with see through windows, to display their nails. These could get a little pricey, though. They can be found many places online but in particular though sites like Etsy, Alibaba and AliExpress to name a few. You will want to do a little research into which is the best option if you are looking toward this type of packaging for your press on nails.
So that wraps up how I package my press on nails and some other packaging ideas you may want to consider. I hope this gave you some inspiration and ideas that will help you decide what you would like to do for your own press on nail business.
This post is about press on nails packaging ideas.
Related Posts
You may also find the following posts helpful.
How To Start A Press On Nail Business
20 Press On Nail Supplies Every Press On Nail Artist Should Own
How To Make Custom Press On Nails In 7 Steps
The Best Packaging Ideas For Your Press On Nail Business


