Wanna know the secret to having the longest-lasting press on nails?
This site contains affiliate links, view the disclosure for more information.


Interested in simple luxury? Try our custom solid color and marble press on nails.
Getting your press-on nails to stay put doesn’t have to be a mystery. With a few simple tricks, you can make them last days—if not weeks—longer. Here’s everything you need to know about how to make press-on nails last longer, from prepping your nails to the best application tips. Let’s make sure you get the most out of your press-ons so they look great and stay secure.
1. Start with Clean, Dry Nails
Prepping your natural nails is the foundation of making press ons last. Begin by washing your hands to remove any oil or dirt. Next, use alcohol or a non-acetone polish remover, even if you aren’t wearing polish. This will remove natural oils that can make it hard for your press-ons to stick.
2. Push Back Your Cuticles
Gently push back your cuticles so there’s no overlap between your skin and the press-on nail. This gives you more surface area for the press-on to adhere to, which helps them stay in place longer. Using a cuticle pusher works well for this step.
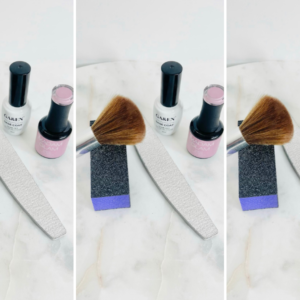
3. Buff the Surface of Your Nails
Buffing is a game-changer for press-on nails. Gently buff your nails to create a slightly rough surface. This helps the glue grip better, which means your press-ons will stay put longer. Don’t go overboard, though—just a light buff to remove the natural shine will do.
4. Find the Right Size for Each Nail
Before you start gluing, find the best fit for each nail. Press-ons that are too big or too small won’t stick as well and can lead to lifting. If you’re between sizes, size up rather than down , you don’t want the press-on to extend past your natural nail but you can always file a slightly bigger nail…this is not the case with a nail that’s too small.
5. Use a Strong Nail Glue
If you want your press-ons to last, use a high-quality nail glue. Apply a small dot to both your natural nail and the press-on nail. This is key! This double-application method creates a stronger bond, making it much less likely that your nails will pop off.
6. Press and Hold
Once you’ve applied the glue, press down on the nail for at least 15 seconds. Apply steady, even pressure to help the glue bond. Be sure to hold each nail until the glue has fully set—this step makes a big difference in how to get your press-on nails to stay for longer.
7. Avoid Water for the First Hour
Water can weaken the glue, especially right after you apply your press-ons. Try to avoid getting your hands wet for at least an hour after application. This means no hand-washing, dishes, or showers right away, if you want the best results.

8. File and Shape After Application
Once your press-ons are firmly set, you can file and shape them as needed. Filing helps smooth any rough edges and customizes the nails to your preferred shape, which not only makes them look more natural but also helps prevent lifting around the edges. (For GOAT NAILS press on nails, you can skip this step because we’ve already done this for you.)
9. Take Care of Your Nails Daily
Even after they’re on, taking a few steps to care for your press-ons will make them last longer. Avoid using your nails as tools—don’t pry things open or pick at anything sticky. Also, wearing gloves when washing dishes or doing chores can protect the glue and keep your nails looking fresh.
10. Touch Up with Glue as Needed
If you notice any corners lifting, don’t wait for the whole nail to come off. A quick dab of glue under the lifted edge and some firm pressure can secure it back in place. Touch-ups can go a long way in keeping your press-ons looking good and lasting as long as possible.
By following these steps, you’ll know exactly how to make press-on nails last longer and stay looking great. A bit of prep and a few care tips can mean the difference between nails that last a day and nails that last a few weeks. Give it a try, and you’ll see the difference in how long your press-ons last!
Let me know in the comments what worked or didn’t work for you when applying press on nails.