Press-on nails are the perfect way to get a salon-quality manicure without the cost or commitment—but let’s be honest, keeping them from popping off can be a challenge. If you’ve ever had a press-on nail fly off mid-conversation, you know the frustration. The good news? With the right prep and technique, you can make your press-ons last for weeks. In this guide, I’ll show you exactly how to apply press-on nails for long-lasting results.

Why Do Press-On Nails Pop Off?
Press-on nails are designed to be temporary, but that doesn’t mean they have to be short-lived. If yours aren’t staying on, it could be due to:
- Improper nail prep: Oils, dirt, or leftover polish prevent the glue from adhering.
- Weak glue: Some nail kits come with glue that isn’t strong enough.
- Poor technique: Rushing the application process can lead to gaps or uneven adhesion.
What You’ll Need
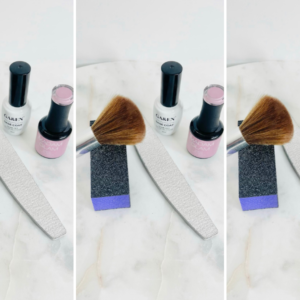
Before starting, gather these tools for the best results:
- Nail glue: Look for one designed specifically for press-ons.
- Nail file and buffer: To shape and roughen the nail surface.
- Alcohol wipes: To remove oils and dirt.
- Cuticle pusher: To prep the nail bed.
- Primer/Dehydrator: Helps your nail adhere.
- Full Cover nails: Choose the correct sizes for each finger.

Step-by-Step Application Process
Step 1: Clean Your Nails
Start with clean, dry nails. Use alcohol wipes or a dehydrator to remove any oils, lotion, or residue from your natural nails. This ensures the glue adheres properly.
Step 2: Prep Your Nails
- Gently push back your cuticles with a cuticle pusher.
- Lightly buff the surface of each nail to create a rough texture then add the primer to the underside of the press on nail, which enhances the stickiness and helps the press on nail stay on longer.
- File your nails into your desired shape.
Step 3: Select and Size Your Press-Ons
- Lay out the press-on nails and match each one to your natural nails.
- If needed, file the edges of the press-ons to ensure a perfect fit.
Step 4: Apply the Glue
- Apply a thin, even layer of glue to your natural nail.
- Add a small dot of glue to the back of the press-on nail. This double application ensures a strong bond.
Step 5: Press and Hold
- Align the press-on nail with your cuticle, then press it down at a slight angle.
- Hold it in place for 10–15 seconds to secure it.
- Repeat for all nails, working one at a time.
Pro Tip: Avoid using too much glue—it can seep out and make the nails look messy.
Bonus Tips for Long-Lasting Wear
- Avoid water exposure: Don’t soak your hands for the first 24 hours after application.
- Reinforce weak spots: If a corner starts lifting, reapply a small amount of glue immediately.
- Protect your nails: Wear gloves when doing chores like washing dishes.
How to Remove Press-On Nails Safely
To avoid damaging your natural nails:
- Soak them in warm, soapy water for 10–15 minutes to loosen the glue.
- Gently lift the edges with a cuticle stick.
- If needed, apply cuticle oil to soften any remaining adhesive.
By following these steps, you will have long-lasting press-on nails without the hassle of frequent touch-ups. Whether you’re a beginner or a press-on pro, these tips will have your nails looking flawless for weeks.
Got a favorite press-on nail brand or tip? Share it in the comments below! And if you’re looking for the best nail glues to pair with your press-ons, check out this post 6 Game-Changing Tips for Press On Nail Adhesive.


