After you’ve created your bomb nails you want to sell them right?! Well, Etsy is a great place to start your press on nail business. Though I predominately sell on my website, I do some selling on Etsy as well. I’ll show you below how I set up my listings from beginning to end. As always I try to be short, sweet and straight to the point. Hopefully, you find these steps simple and easy to follow.
This post may contain affiliate links, which means I/we may receive a commission, at no extra cost to you, if you make a purchase through a link. Please see our full disclosure for further information.

This post is about how to create an Etsy listing for your press on nail business.
What you will need:
- Already created Etsy Shop
- Pictures for your listing (10 is the max)
- A price in mind for your item
- A scale to get package weight
- Your package dimensions
Once you have created your shop on Etsy head over to your Shop Manager, where you’ll see the Listing tab, select it then select ‘Add a Listing’. After we have created the first listing, you can choose to duplicate it by selecting ‘copy’ from the original listing in order to make the process faster for future listing. At that point, you can just change a few things here and there to fit the new listing. You will appreciate this feature later! 🙂


STEP 1: PHOTOS
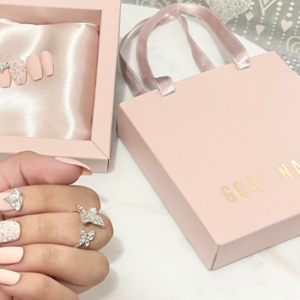
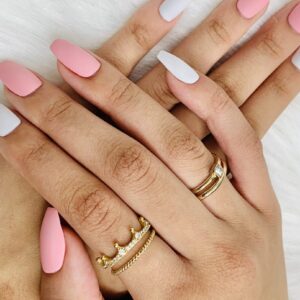
Here you will be adding the very best photos of your item. For instance, for your press on nails sets, you can add a picture of them close up, farther away, with the packaging, show a picture of you wearing them, etc. You can even include a short video snippet of what you’d like to share about your item if you’d like. I would also include a pic of your size chart. If you’re in need of a size chart you can purchase a template from my Etsy shop here. Also, it would be helpful to include a picture of the different nail shapes you offer. For the very first picture, I would choose a picture that is farther away so that you are able to zoom in to adjust how it will look on the search results page. There is a little slider for you to adjust the image.

STEP 2: LISTING DETAILS
Title: You’ll need a title for your listing. I would recommend searching through Etsy items from other sellers that are selling something similar to yours to get an idea of what the title should include. For the title, I would try to think of things/phrases your customer would type to find your item. You can use commas to separate the phrases or the | symbol like this: Nike Press On Nail Kit | Matte Reusable Coffin Nail Decal Set | Glue on Glossy Fingernail Extensions | Choose Your Custom Shape Fake Nails.
About this listing: For press on nails you will be selecting the following:

Category: start typing in what your product is and choose the category that best suits you.

Renewal Options (Automatic) and Type (Physical)
Description: This is the longest part of this entire process, but at least for the most part you will only do this once then you can copy and paste majority of it into each new listing.
I always include the following areas in my press on nail listings:
- copy and paste the title as the very first thing in the description.
- description of what’s included in this particular listing and the colors so they have an idea of what to expect in person.
- a link to other items I sell that may pertain to this particular listing
- encourage them to leave a review (this should be in your packaging as well)
- include a short sizing and measuring guide for them (even though you have already included your sizing chart in the picture above) (let them also know how many nails they will receive (10, 24, etc).
- brief description of how to apply the nails.
- include any disclaimers you have like how the display settings may be different from the actual item.
- include your return/exchange policy.
Section: Once you have a good amount of items, sections will help your customers greatly. Sections help the customer to easily get to all your items of a certain type. You can set these up later.
Tags: These help people find your items, so use words people would search. You are allowed 13 tags. I would use all 13! Start with using everything you have in your title as a tag. Every phrase is a tag: for instance ‘glue on nails’ would be considered one tag. Each tag can only be 20 characters long.
STEP 3: INVENTORY AND PRICING
Price: you should have an idea of what you want to charge based around what your competitors are charging.
Quantity: keep in mind how many you plan on making of this item. Once that number has been met meaning it is sold out then the listing will renew and you will be charged a listing fee of twenty cents each time.
STEP 4: VARIATIONS
You will want to select Add Variations, then choose a variation type. If your variations are not by color then select Create a New Variation. Depending on the type of variations you have, you can also link photos to each variation. Then type in the name, for instance, size could be one and shape could be another. Under each type you would add a name for each option, for instance, XS, S, M, L, XL could be different size options.

STEP 5: PERSONALIZATION
This is the section where I would mention how to enter their custom size and you could have them enter whether they want glossy or matte here as well. You’re limited to 256 characters.
STEP 6: SHIPPING
I always choose the below shipping options. Adjust your processing time to the amount of time it will actually take you to complete multiple orders of this item.

I mostly offer free shipping so I use the cheapest shipping service such as USPS First Class Mail. The delivery time is about 2-6 days. You can choose whichever you’d like but the price will be different for each.
Lastly, you will enter the weight of your package when it is completely packaged and ready to ship. You will also enter the size of your item when it is packaged and ready to ship (basically the size of the bubble mailer you’ll be using). Then just select Publish Copy! Whew that was a lot I know but you will only have to do majority of what we just did ONLY ONCE!
I hope you guys found this easy enough to get your press on nail business started on Etsy. If you have any questions don’t be shy I’m here to help! 🙂
This post is about how to create an Etsy listing for your press on nails business.


